

Renovating the Master Bathroom at Jackson Street was a process in two stages. We very much wanted to renovate the Guest Bathroom first, because we have people stay with us all the time, and there was only one craptastic shower in the whole house – in the Master Bathroom. One of those teensy corner showers that never looks clean (even though it was new when we bought the house). I’m pretty tiny, and even I felt cramped in it. We wanted to redo the guest bathroom, but to move the clawfoot out, we decided to do a “Mini” makeover on the master bath first : everything but the shower. I wanted a big marble shower… and we didn’t have the money for that. That will be PHASE TWO!
The master bathroom was huge, and when I realized that the clawfoot from the guest room would fit in this space PERFECTLY, I got super excited. But then I realized we’d have to move the toilet to make my plan work. I had no idea if that could be done. It seemed like a big job. But, true to form with us, I said, “So, I have an idea….” and Doug listened with patience, and didn’t tell me I was crazy. He just figured it out. So, we moved the room around.


Doug started working on the important stuff, like plumbing, electrical and floor repair


I started on the pretty! Since lighting is my FAVORITE, I started there. I found a small chandelier and matching sconces, and I had to have them. The chandelier matched one that I had found over a year earlier, in a completely different part of Indiana, that we rewired for the centerpiece of our library. So there was no way I wasn’t going to find a place for the “Little Sister” chandelier I found.


We put the sconces in first, and painted before we put in a new floor or fixtures. This makes life SO easy. The color I stumbled upon in a mistint section at Home Depot for five dollars. It’s the most gorgeous shade of blue, the color of a Tiffany Box. I don’t like fancy jewelry (my wedding ring is the only fancy piece I own), but the color seemed a perfect match to the jewelry of the chandelier.


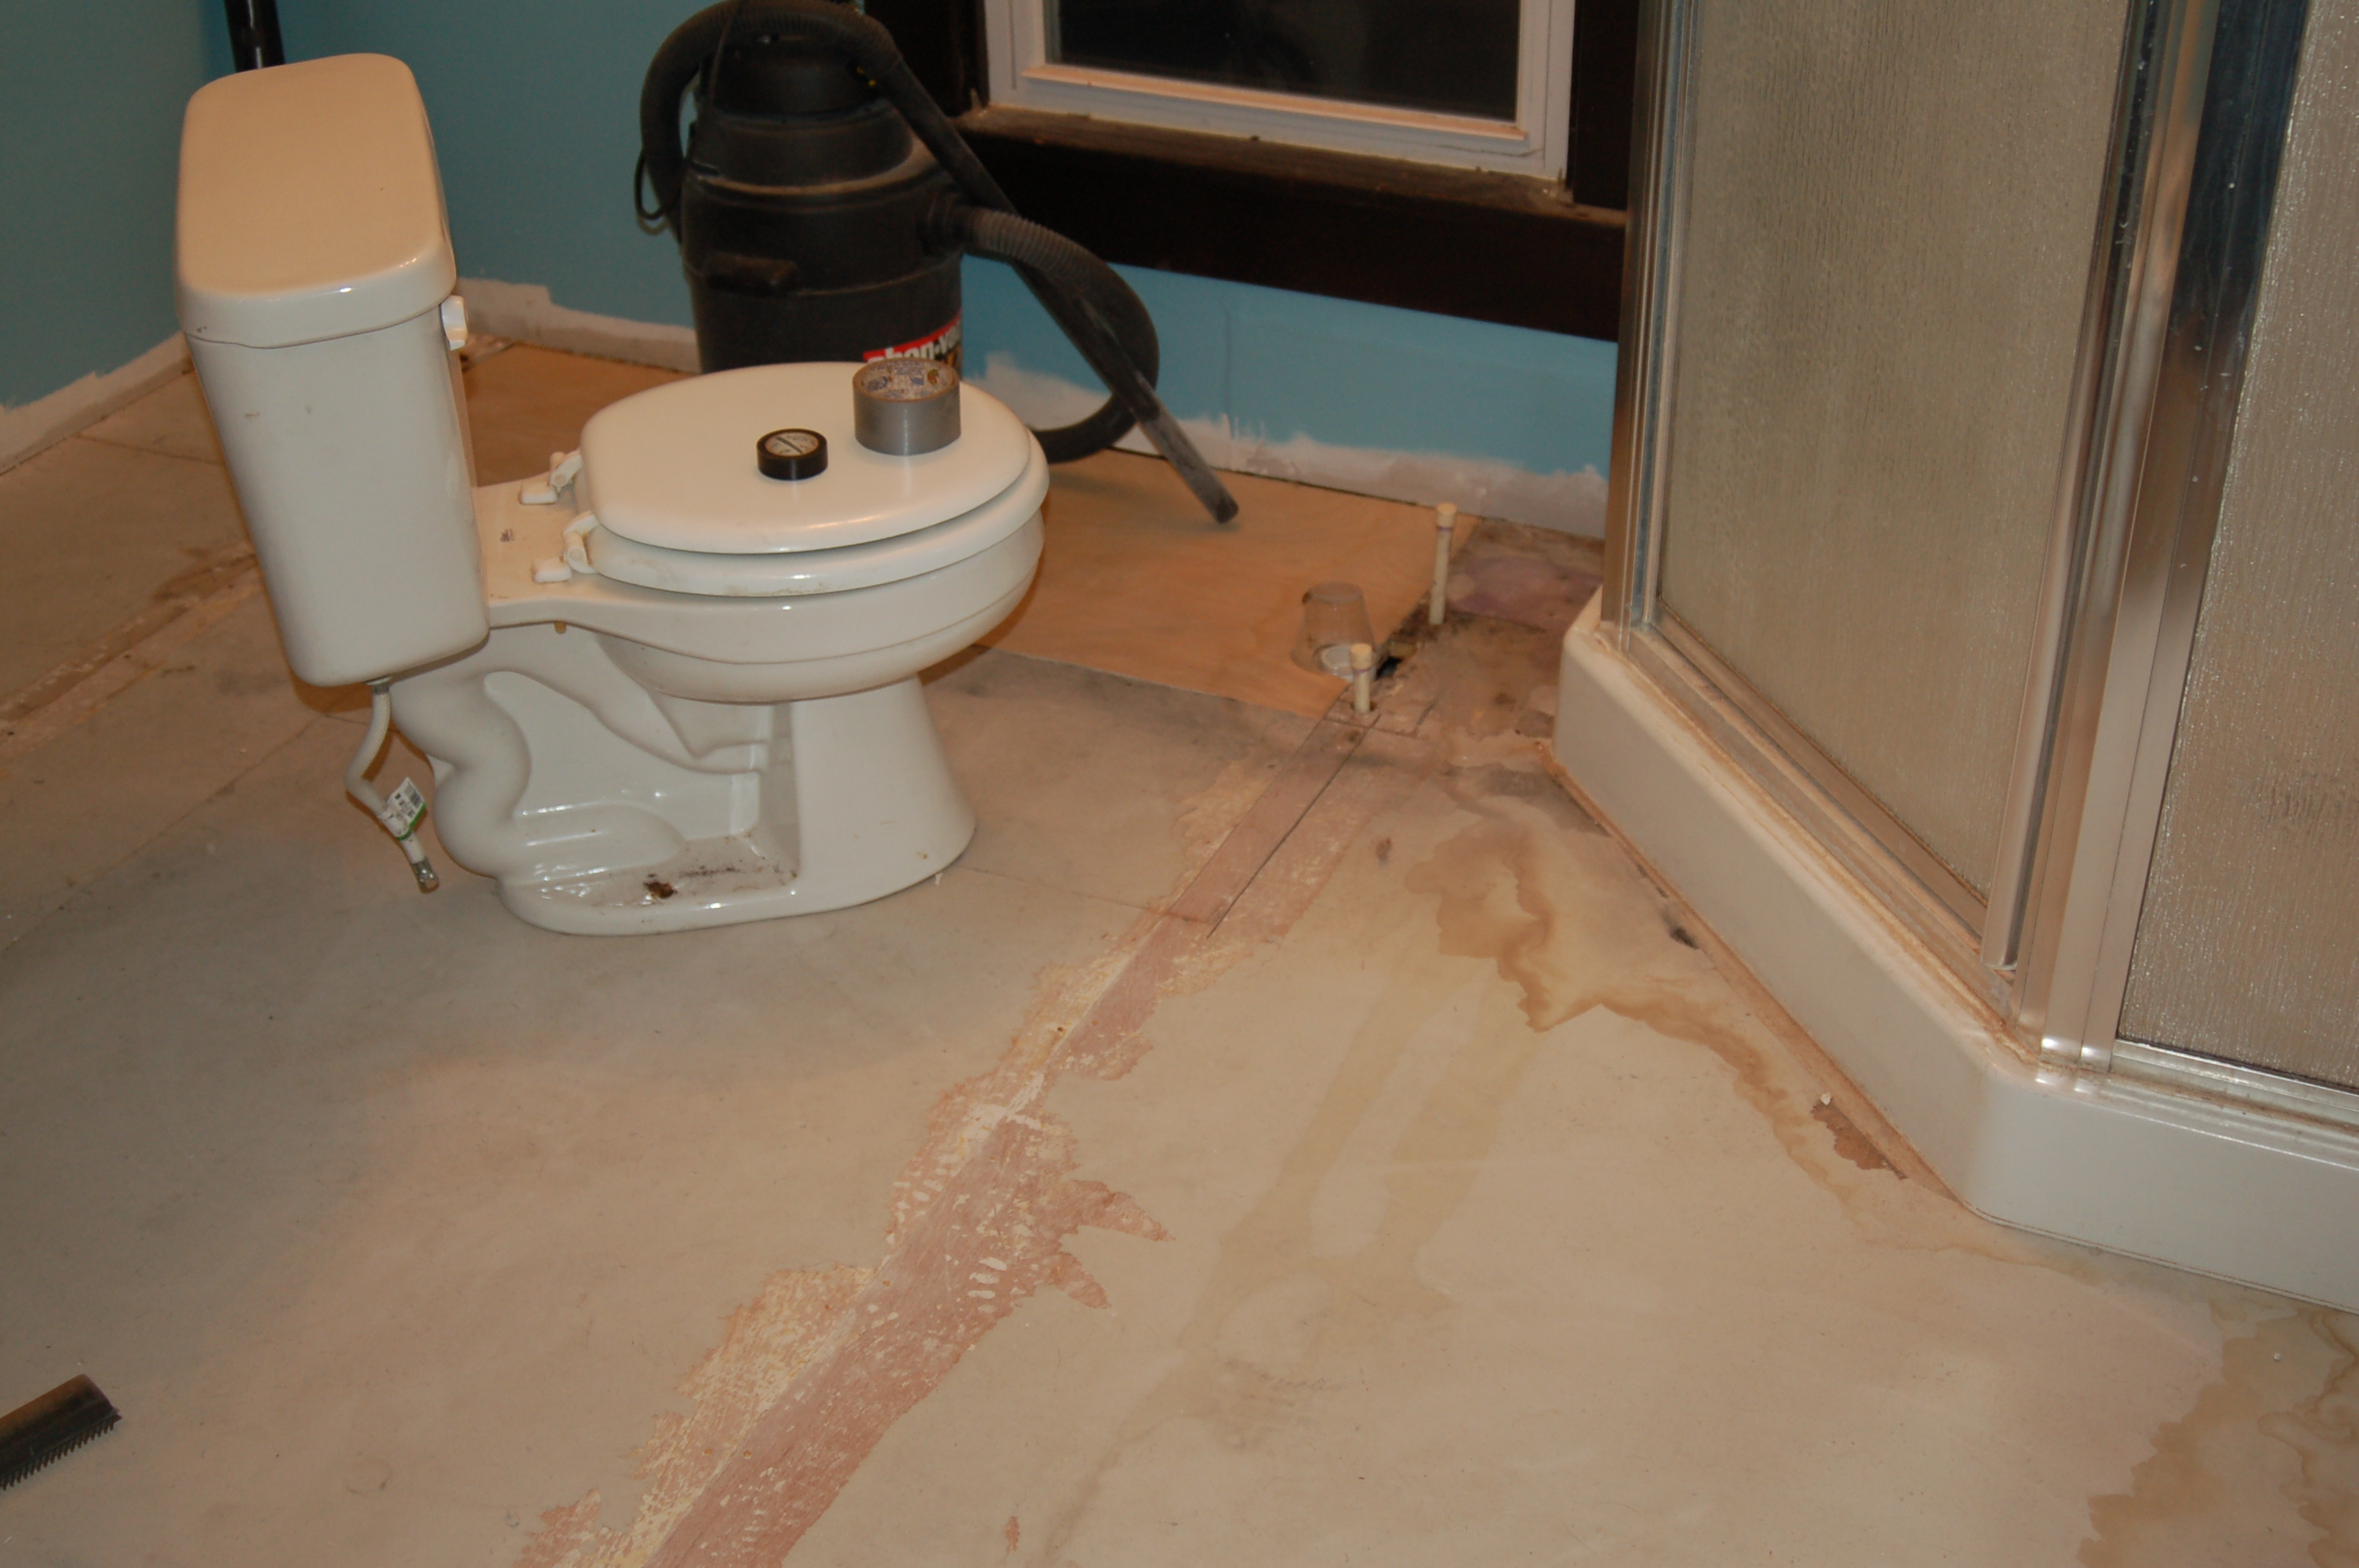
Sometimes you have to get the toilet out of the way, and the shower is the best place to do this. Oh, yeah! We had to install a shower in the downstairs bathroom to get through this renovation and be able to bathe. That’s important. Always make sure you have a shower.

We knew we couldn’t match the floors in the rest of the house (the original from 1875), so we decided to go in a completely different direction to make it purposeful. The dark wood looked GREAT. I stained baseboards to match, and we sealed up the edges with silicone to keep the edges water tight. Once the floor was done, we were able to put fixtures back in.


The upstairs was definitely a workshop for a while!


Fixtures back in!


The vanity was a dresser we found, and plumbed it to turn into a vanity. That was lots of fun – and I’ll give it its own blog post for the next Flashback Friday when that happens!

Here’s the shower. See? I told you. Craptastic.

The chandelier and sconces turned out great. My $.02 : basic candle covers are boring, so make your own for a custom look to match your room! I made my own candle covers, using scrapbook paper and glue. I glued the paper around basic white plastic candle covers. You just have to make sure that the paper doesn’t get too close to the bulb, by trimming it just beneath the top of the candle cover. But it’s pretty easy, and really cheap! But it gives the whole chandelier a great look. I also ordered new crystals, which made me REALLY angry when they came in. I ordered “Amber,” and these were definitely a deep shade of pink. This led to a pretty “fun” conversation with the lady at the crystal place, who tried to assure me that Amber WAS rose colored. Amber is NOT ROSE. I wanted to scream “I’ve SEEN JURASSIC PARK! I know what color amber is.”
Doug told me to chill, and put the crystals up and see what they looked like.


Crap. I love them. (But, they are still pink).


I decorated a bit, and hung up some of my photos from Alcatraz (yes, you read that right. Abandoned places are really quite beautiful). We added some storage, and voila! A gorgeous bathroom – functional, antique, and Victorian. Stage one!


I hope you don’t mind, but I’m going to reference this post in my own blog and a picture in particular. You will get credit for it of course though 🙂 and a link back to this page.
That sounds great! Thank you!
Wow again! Now *that’s* a Bathroom!
I see amber in those pendants. I don’t see pink at all! 🙂 Lovely job!