


When we first walked through Martin Place, the kitchen was the only room that really – truly – gave us pause. We were used to counters, and space, and…. appliances. About the only thing that we could say here was “Wow! This gets great light!” There were big windows, and two rooms : a kitchen, with a space for a refrigerator and stove, and a small counter area with a sink and spot for a dishwasher. The wall was like an island – you could walk around it through doorways on each side. Around the wall, we found ourselves in a 26×9 breakfast “nook.” With floor to ceiling windows, one outlet, and no HVAC (this room was an old porch, so it is on a concrete slab), this was a skinny space that did not seem to be practical. We’ve been told that a former family who lived here with 10 children put a couple of picnic table in it for their meals. THAT seems like it would fit perfectly. So, it seemed like either adopting 10 children, or a gut renovation was in order. We went for the latter.


When we worked out the bank loan for the house, one thing went in our favor. We planned to buy the house, and basically double the loan amount to cover the renovation of the exterior. When the bank crunched the numbers, we were astounded that it was lower than the mortgage for our Jackson Street house. Ummm… what? Without FEMA required flood insurance on the new house (since, JOYFULLY, we weren’t in a flood plain anymore), this house was going to cost us less per month. So, I brought up the kitchen : if we renovated the kitchen NOW, as part of the loan, how much would our payment be? The payment would be even with Jackson Street. SOLD. The other bonus was that we were allowed to do the work ourselves, once we submitted proof that we knew what we were doing, and we weren’t completely crazy. The “not being crazy” was bit harder to prove than our construction skills.
Planning : Commenced. The worst room, and the most expensive room, would be done. In six months (HA!) according to the bank contract. Bring it on.
With a chimney in the middle, the space was really, really stuck. Once we knew that the chimney wasn’t functioning for ANYTHING, we came up with three philosophies : keep the chimney, and incorporate the exposed brick into the design (if we could expose it), remove the chimney, move the wall, and create a smaller Butler’s Pantry and larger separate kitchen, or remove the chimney, and create one big, open kitchen.

When I design a space, I just sit in it. For a while. And sketch and measure. I created a floorplan on 11×18 graph paper, and cut out color-coded index cards in the measurements of standard cabinets and appliances. I know this can be done on computer, but manipulating by hand is more creative for me. I probably came up with about 50 floorplans. I photographed each of the 50 on my iPad so flipping through them was easy. 50 plans, however, makes Doug’s head spin, so I picked out my top three designs and we went from there. Here are a couple. The second is the one that won, but it still went through tweaking after this.
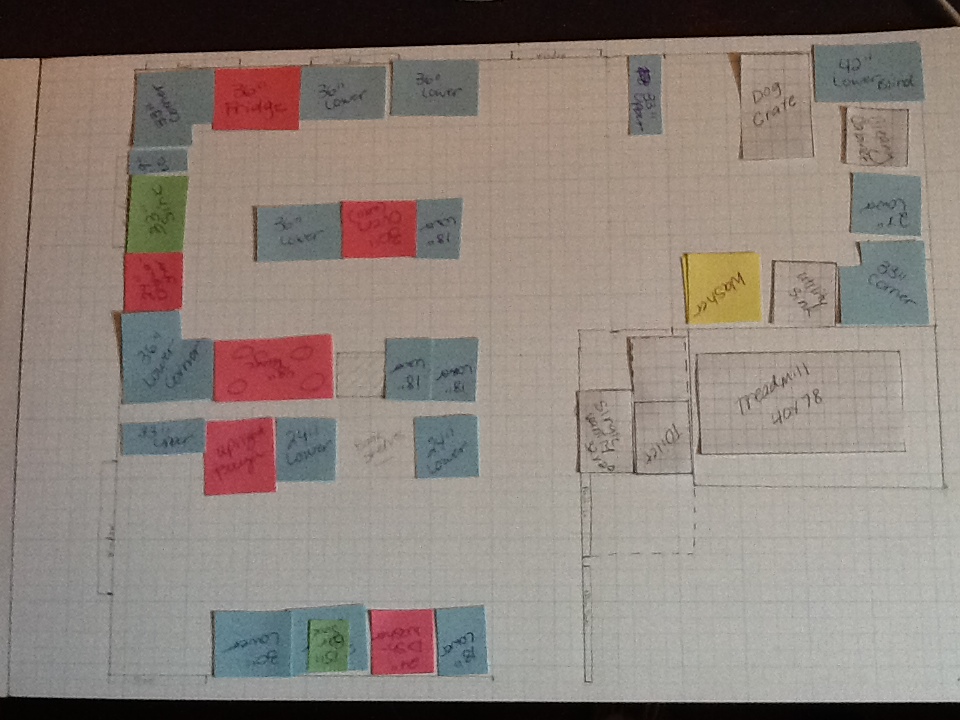
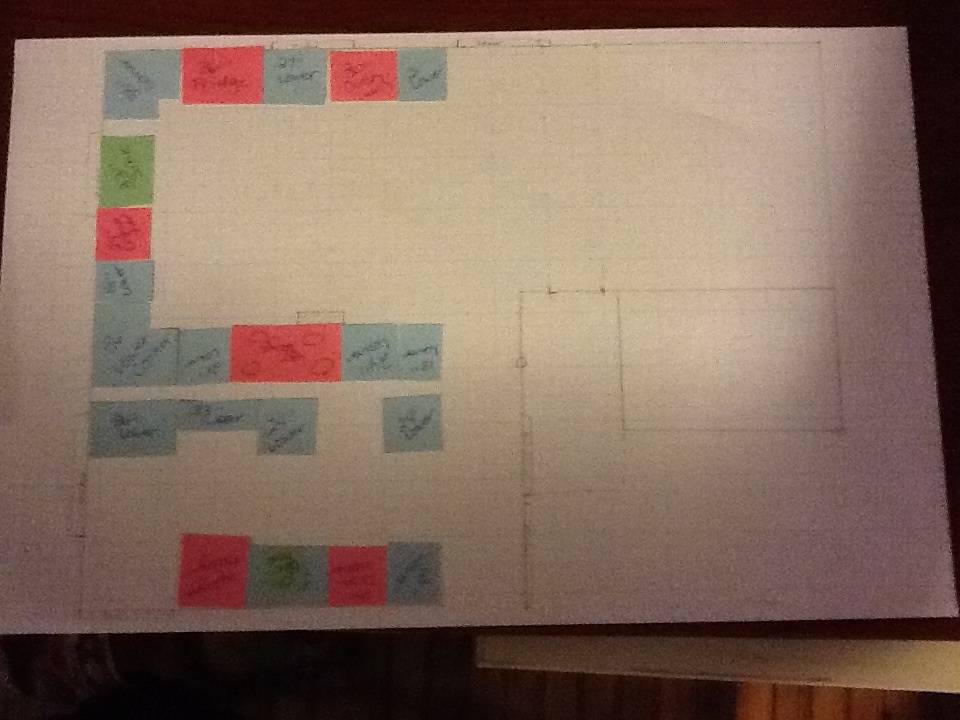
Just like our previous kitchen, we made many decisions with our Holiday Party in mind. When you host 70-80 people in your house, and cook for them, the kitchen is a big deal. But, we also wanted a kitchen with Victorian character and sensibilities that fit with the house. We wanted it to be something that COULD have been there in 1902. We opted to remove the chimney, move the kitchen wall to create a smaller room in the front as a Butler’s Pantry. This would expand the breakfast nook to create a nice sized kitchen. A Butler’s Pantry was almost always situated between the kitchen and the dining room, and that’s what we would have here. It was a place to organize the food before serving, and it served as a buffer to keep the smells and noises of the kitchen away from the guests who were eating. That aside, Doug’s main happiness revolved around the fact that the Servant’s Stairwell would now empty into the Butler’s Pantry, which he found quite perfect. Check out a great history of the Butler Pantry in various time periods HERE.
We started demo, and asked the brothers from the Alpha Zeta Chapter of Kappa Kappa Psi at Indiana University to help us with the demo. If you’ve never demo-ed a REALLY well built, strong house, and tried to knock down a former exterior wall…. well, then you haven’t lived. It was NOT easy.


We found many, many types of wallpaper. Many, many weird electrical things. A giant wall made of thick wood sheathing. That would not budge. Pulling down ceilings is a treat as well! This did give us a feel for what we would need to do as far as plumbing, electrical, HVAC and insulation.


Oh, and sometimes, when you try to explore the ceiling to see where the upstairs plumbing is so you don’t hurt anything before demo, you find a pie plate. UNDER THE DRAIN of the upstairs tub. Because, you know, it’s better to shove a pie plate in your ceiling to stop leaks, then to just FIX THE LEAK.


Yes. That happened.
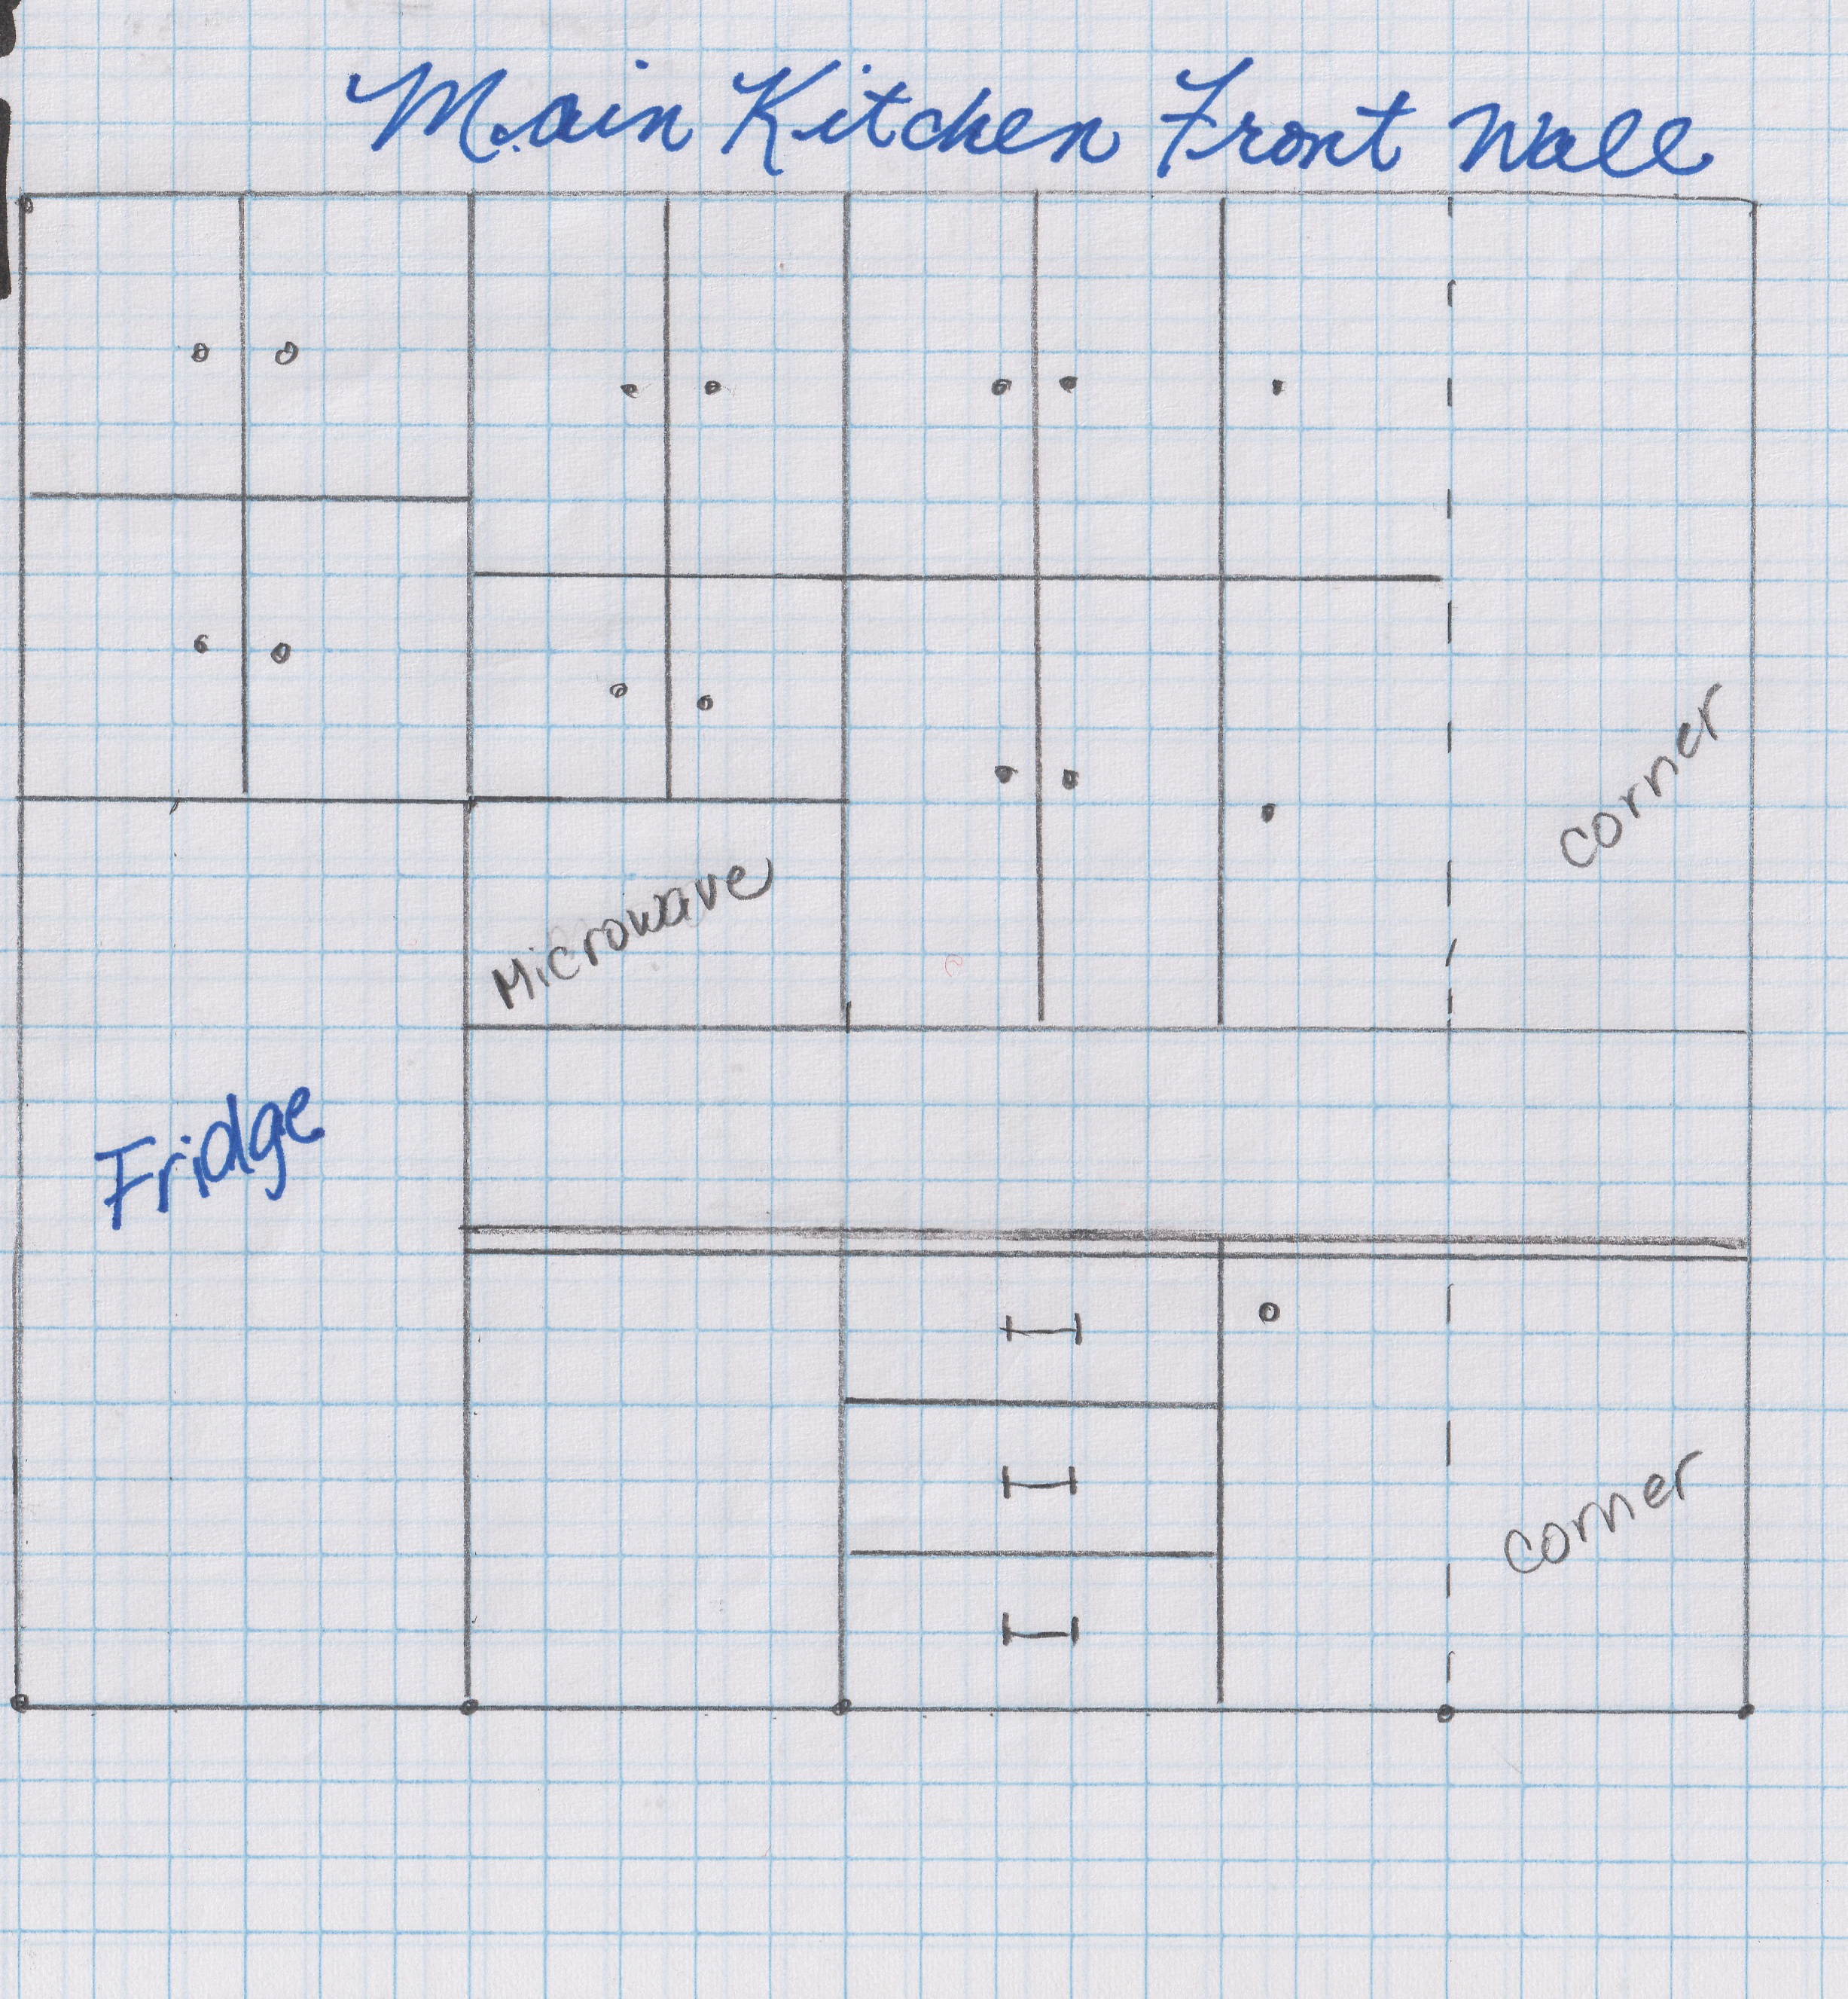
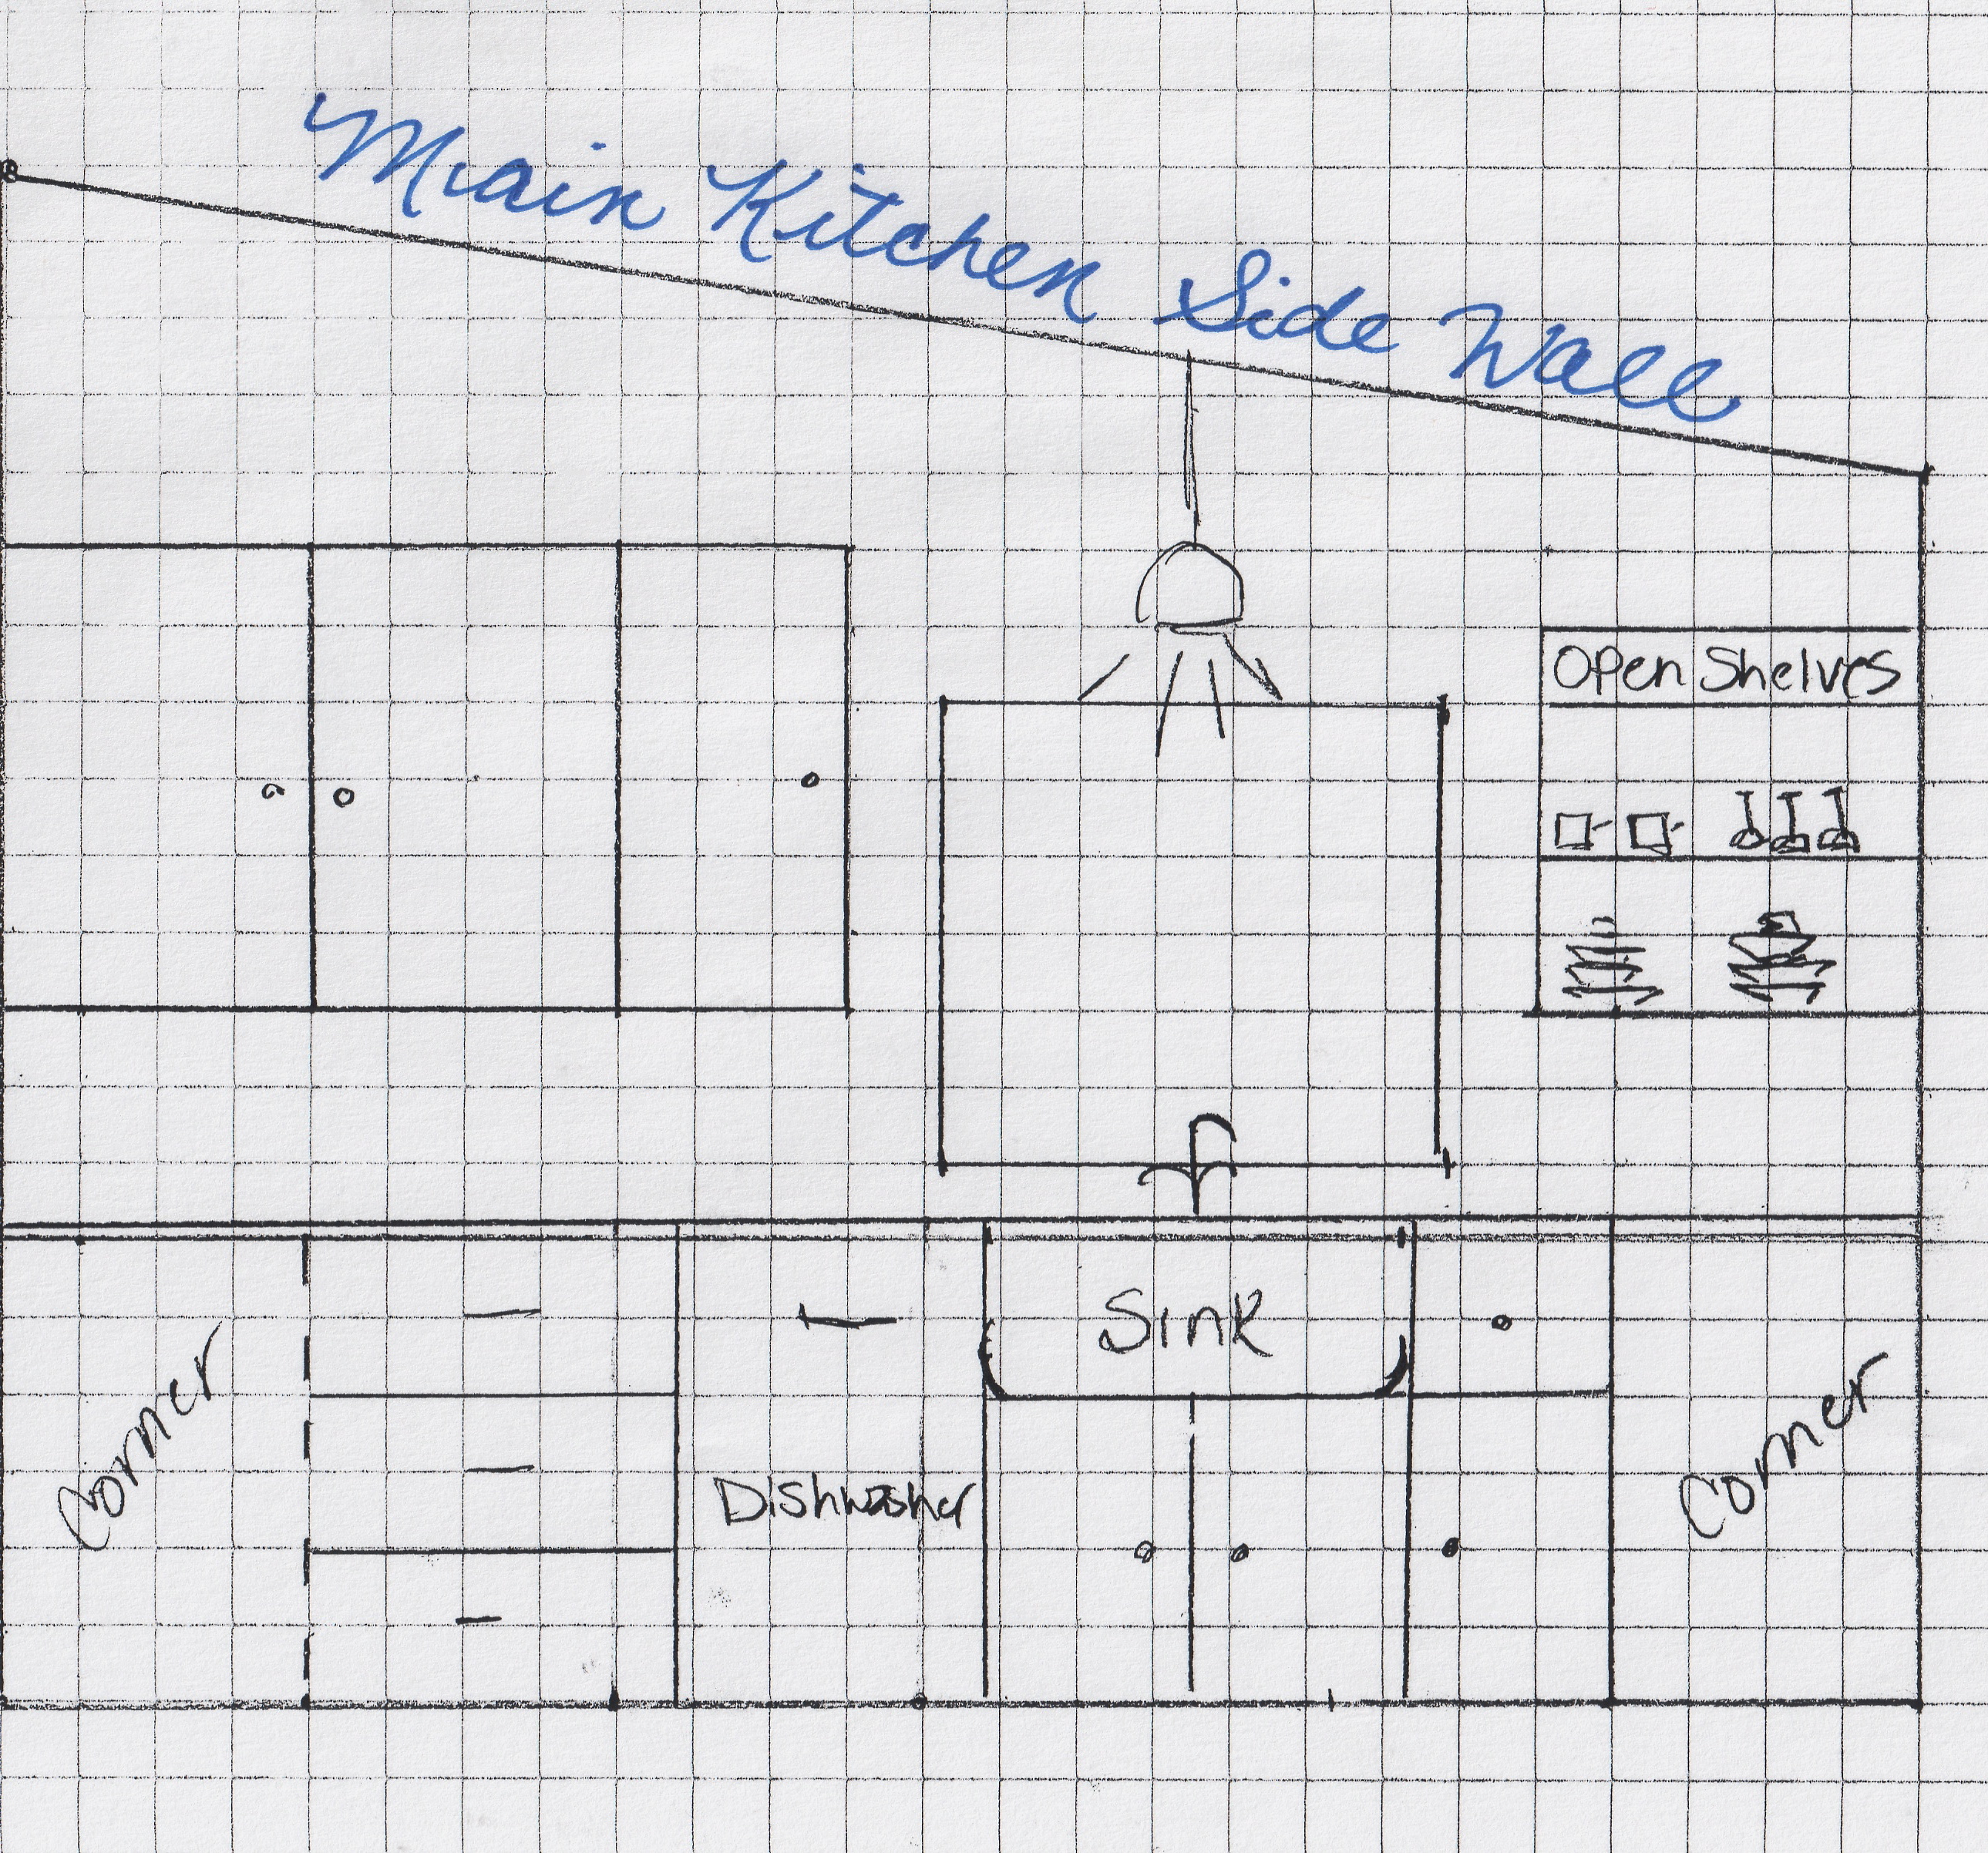
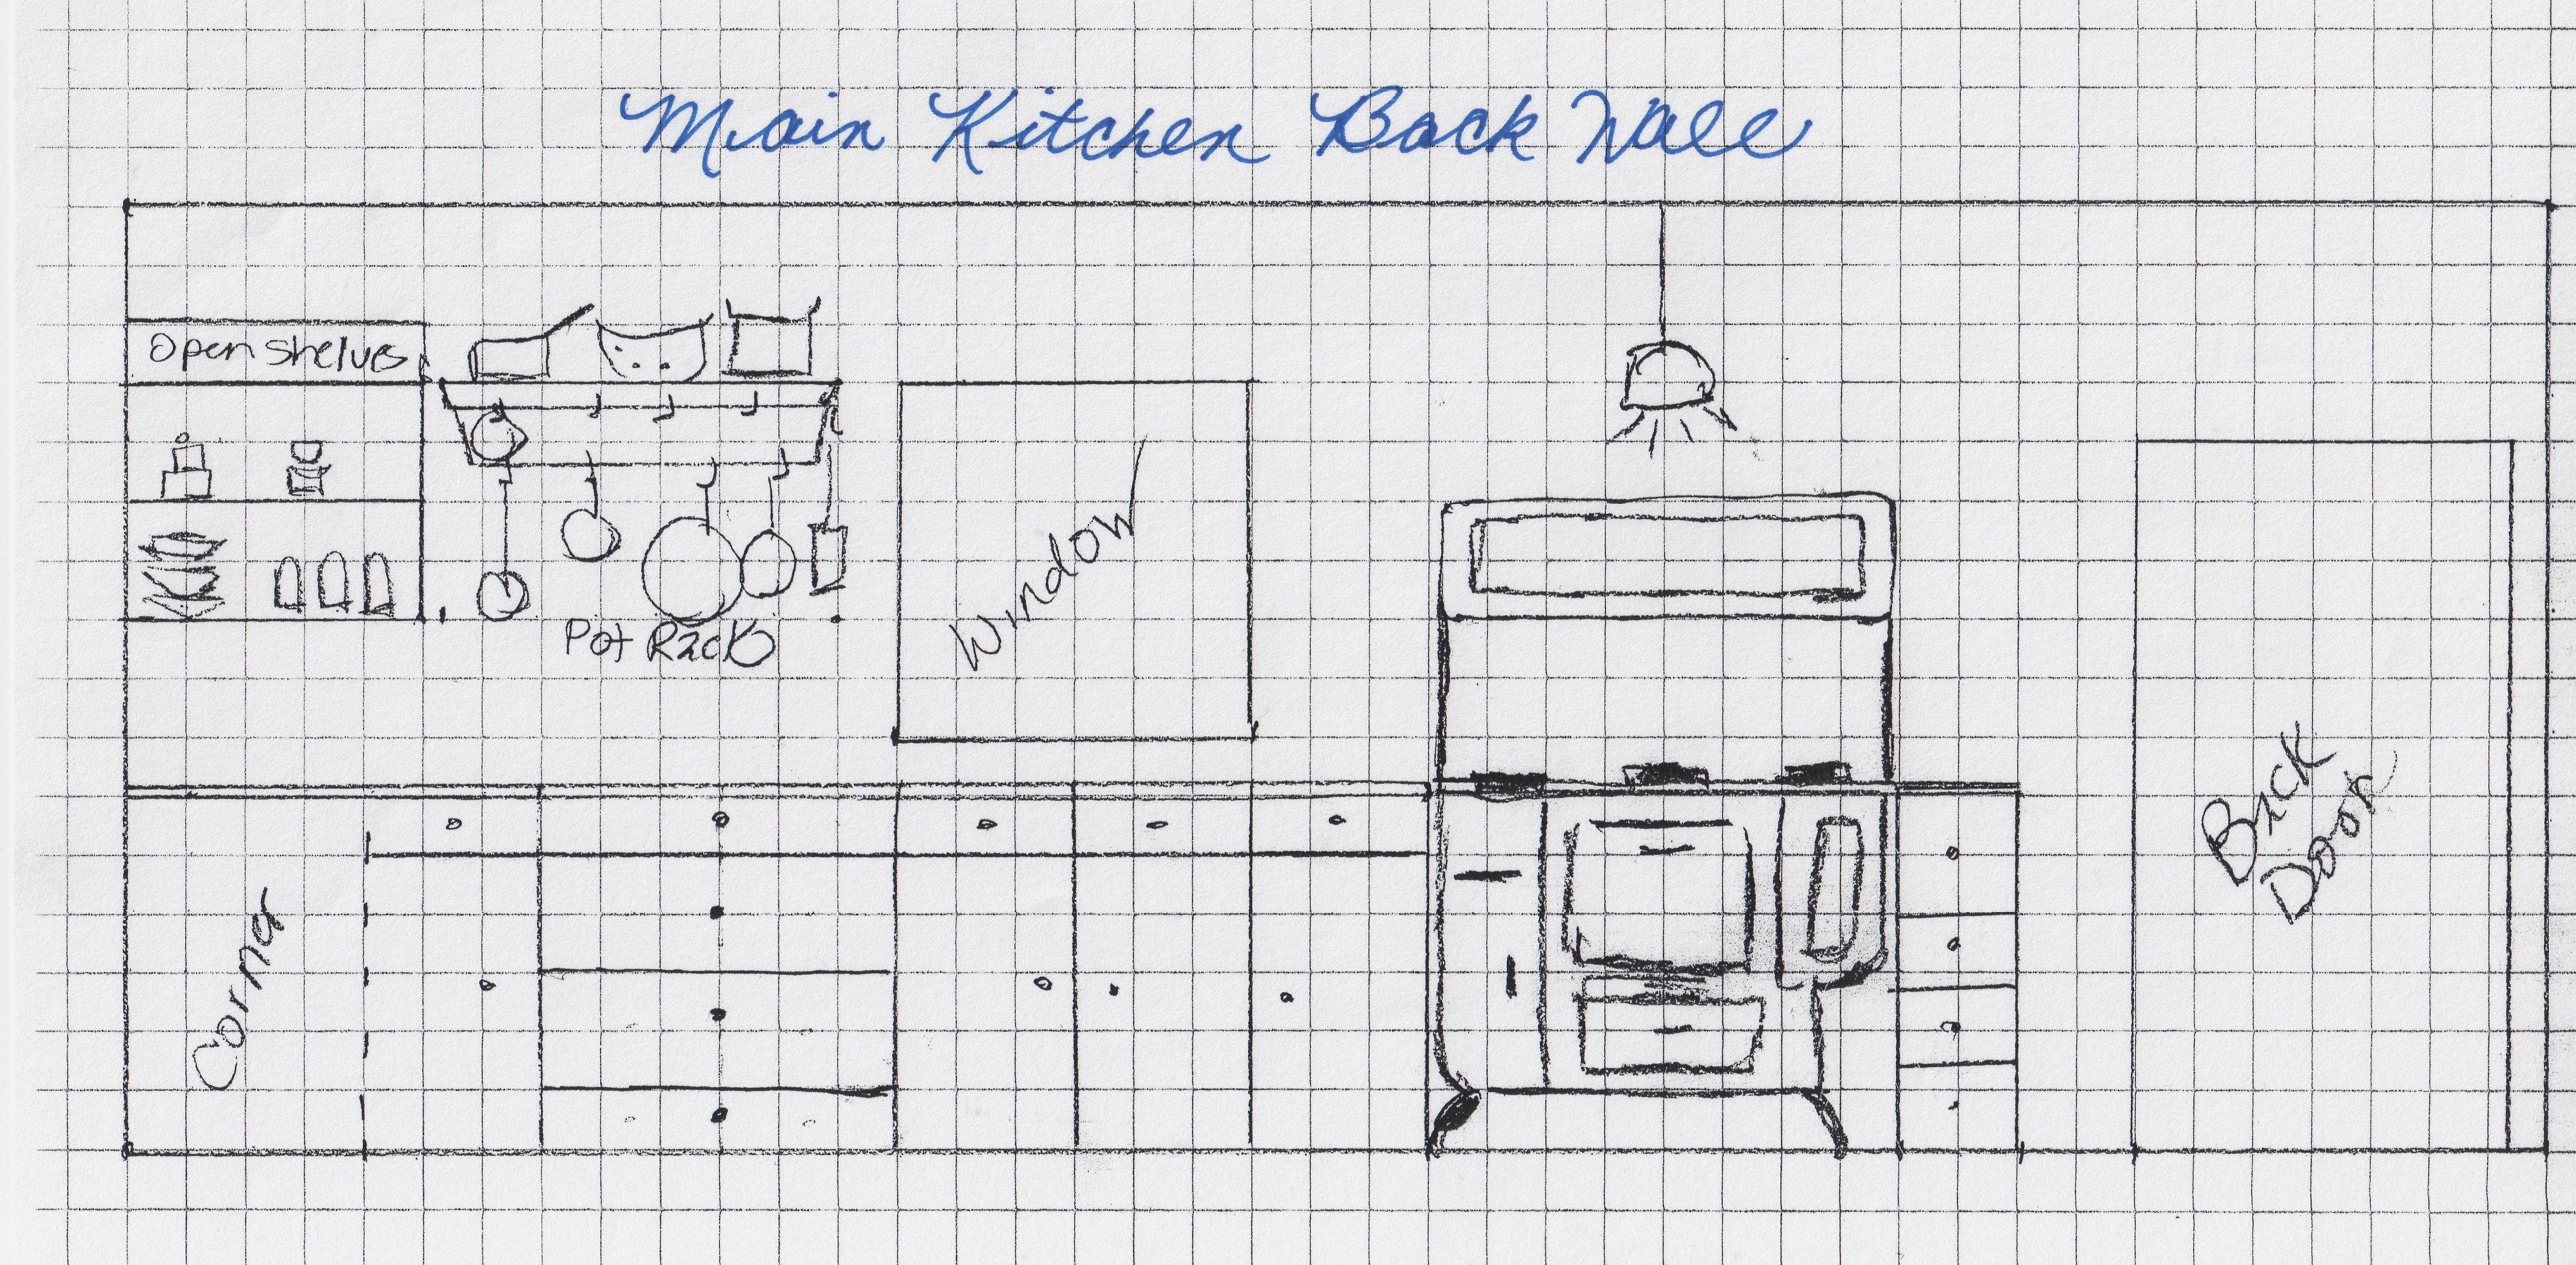
I inventoried everything in our current kitchen, to make sure that I had room for everything, exactly where I wanted it. I made a drawing to show what each wall would look like. Once I had this idea of what I wanted, and where I was going, we had a map, a direction, and a vision.
And, my cabinet maker said I did his job for him, and he’s never had anyone have something so well planned. That’s me. I’m a planner.


Next Up in Part 2 : More Demo (including the chimney removal) and framing.
