Once we had all the wood dyed, we did the first round of woodwork – the Crown Moulding, and the Picture Rail. Unlike the Study, we’re putting LEGIT picture rail in here. Which, is MAYBE a little silly, considering that there will be almost no wall space to hang things on. But, I like it, and in the places that we CAN hang art, it will result in less holes in the anaglypta, and will look SO FANCY. And, “Looking So Fancy” is always a goal at the top of my list.
For the Crown Moulding, we opted to do it in two pieces. This was a common technique in the Victorian era – to use multiple layers of woodwork, and it’s also PRACTICAL and SAVES MONEY, which, let’s be honest, are two things that we Victorian Home Renovators don’t get to say very often. Using multiple pieces of moulding is cheaper, because two smaller width pieces cost less combined than one giant piece. The practicality comes in, because as you know, you never, ever have straight walls or ceilings. By using two (or more) pieces, it gives you a little more flexibility to make the installation work.
For the Crown, we used two pieces. Against the wall, we used a 5.5″ baseboard, which we turned upside down.
And against the ceiling, we used a small Crown Moulding. Together, these piece looked like one seamless, bulky piece of moulding!
But wait – I’m getting a little ahead of ourselves. We also had to modify the original baseboards to go next to the new fireplace. First – take all the old nails out. No one like tetanus!
If you don’t have a project that reminds you yearly to make sure your tetanus shot is up-to-date, are you REALLY renovating an old house?
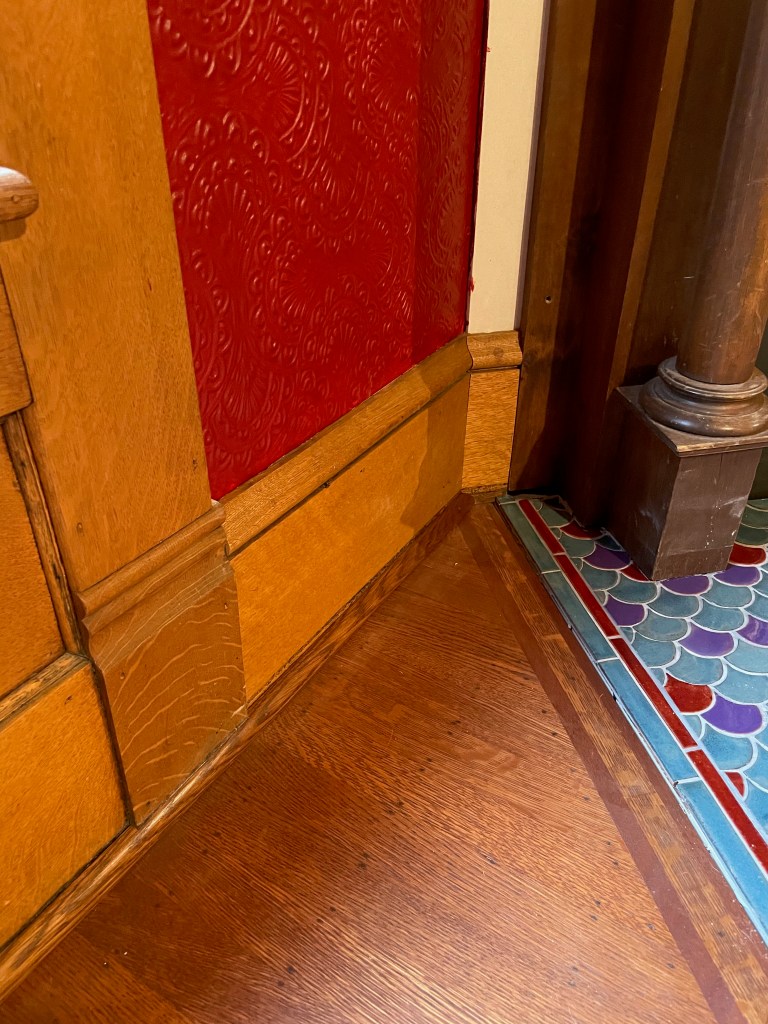
The baseboard is in two parts (just as the Victorians intended!). The flat main board, and the fancy cap.
Since we put the fireplace in the corner and created all sorts of angled problems for ourselves (as you do), we used the Dremel Moto-Saw Kit to make the coped angled cuts. (Some tools were gifted by Dremel, but all content is always based on my honest opinion!) It really made precise cuts – which is good, because cutting into original molding is NERVE-WRACKING, because you can’t can’t get more material if you screw up.
Beautiful!
That is going to fit together nicely!
Boom. It’s like we leveled up.
While it looks super gross without the quarter round, the fit of the baseboard looks like it has always been here. Also – TILE SNEAK PEEK!
Better with the quarter round.
“Hey did you guys have to make any completely bat-$h*t crazy cuts to make this work?”
I am SO GLAD YOU ASKED that question. See this piece of quarter round that has to fit around the baseboard, the tile, AND the mantle?
There it is! We’d like to thank Dremel, several chisels, and Doug’s un-ending patience for this Award-winning piece of carpentry.
Once we added wood to frame the mantle to connect the new walls to the finished anaglypta, it really looks like it has always been here. At least, to me. Maybe you think it looks like an add-on! I am quite content.
Here’s the fireplace wall before adding those side pieces. In order to make the weird angled copes for the picture rail, we needed to cut the middle piece first, and EXPERTLY hold it in place with painters tape. We didn’t nail it in, because you need some flexibility in case you need to wiggle some things – since the side pieces would need to be a perfect length to hit the door frame and the window frame.
We started working the crown and the picture rail around the room. Here’s the upside-down baseboard.
It already looks so good, even without the actual crown part.
I bought some picture rail hangars from House of Antique Hardware – and I love how it’s like little jewelry for the room. And CHEAP. TOTALLY CHEAP JEWELRY!
I’m especially in love with the crown surrounding the bookcase!
Mitering up this inverted baseboard was made a lot easier with the Moto-Saw. Check it out!
It made a really clean cut – we are hooked.
With the second layer of moulding up – the Crown section – it really looks polished.
To make the joints fit, the coping was a little complicated. Since crown moulding is at an angle, and you need to cope it at an angle, it’s a challenge to get it right.
Clamps helped to hold it at the correct angle, like it would be on the wall.
Crown going up!
Beautiful!
Super excited about how this turned out – here’s a glance around the room!
Stage one of the woodwork complete!


“If you don’t have a project that reminds you yearly to make sure your tetanus shot is up-to-date, are you REALLY renovating an old house?”
–Best line bar none! I felt this, especually, since I’m getting a booster tomorrow. Love your posts but I really love your pictures and explanations!
Safety First! 🤣
That looks absolutely amazing! Great job!
Thank you! 🙂
Fabulous as always! You make everything look so easy.
❤️❤️❤️
Is it weird that every time I read the word “analglypta,” I start singing it in my head to the tune of “Anatevka” from Fiddler On The Roof???
ANYWAY… this is gorgeous.